Pipe insulation is vital for optimal temperature control in buildings, protecting pipes from weather and enhancing energy efficiency. It prevents pipe freezing, regulates wall temperatures, reduces heat exchange, and maintains indoor comfort. Choosing outdoor-grade materials like foams or fiberglass ensures durability. Proper installation with snug fits and reflective barriers maximizes savings. Regular maintenance checks, sealing, and cleaning extend insulation lifespan, reducing energy costs and protecting against freezing damage.
Looking to boost your home’s energy efficiency? Insulating exterior walls with plumbing is an effective strategy. This comprehensive guide delves into the world of pipe insulation, explaining its benefits, material choices, and installation techniques. Learn how proper pipe insulation improves energy performance, reduces heating/cooling costs, and prevents moisture damage. Discover expert tips for long-lasting results and maintain optimal wall insulation for years to come.
- Understanding Pipe Insulation for Exterior Walls
- Benefits of Proper Wall Insulation with Pipes
- Choosing the Right Materials for Exterior Insulation
- Installation Techniques: A Step-by-Step Guide
- Maintenance and Longevity: Ensuring Optimal Performance
Understanding Pipe Insulation for Exterior Walls
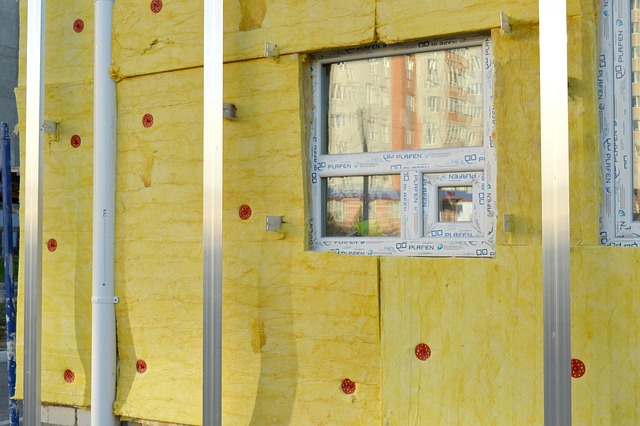
Pipe insulation is a crucial component in ensuring efficient and effective temperature regulation within buildings, especially for exterior walls. It’s designed to wrap around pipes that carry hot or cold water, protecting them from harsh weather conditions and preventing heat loss or gain. This type of insulation acts as a barrier, slowing down the transfer of heat, which can significantly impact energy efficiency.
In the context of exterior walls, pipe insulation plays a vital role in maintaining comfortable indoor temperatures. By insulating pipes that are exposed to freezing temperatures, it prevents them from freezing and bursting, ensuring continuous water flow during cold months. Moreover, it helps regulate wall temperatures, reducing the overall heat transfer between the interior and exterior environments, thereby enhancing energy conservation.
Benefits of Proper Wall Insulation with Pipes

Proper wall insulation with pipes offers numerous benefits that extend beyond energy efficiency. By enhancing thermal control, it helps maintain comfortable indoor temperatures, reducing the strain on heating and cooling systems. This leads to significant cost savings on utility bills over time. Moreover, pipe insulation plays a crucial role in preventing freezing pipes during cold weather, which can otherwise cause damage and disrupt water supply.
It also contributes to improved air quality indoors by minimizing condensation on walls. Condensation can lead to the growth of mold and mildew, both of which are not only unsightly but can also trigger allergies and respiratory issues. Efficient pipe insulation ensures consistent temperatures along exterior walls, creating a healthier living environment.
Choosing the Right Materials for Exterior Insulation

When it comes to insulating exterior walls with plumbing, selecting the appropriate materials is paramount for energy efficiency and long-term durability. The key lies in choosing pipe insulation that’s designed for outdoor use, capable of withstanding extreme temperatures, moisture, and UV exposure. Look for products made from high-quality foams or fiberglass, which offer excellent thermal resistance and protect against condensing water.
Ensure the insulation fits snugly around pipes to prevent air gaps, allowing for optimal performance. Additionally, consider options with a reflective barrier to reflect heat back into the building, further enhancing energy savings. The right pipe insulation not only contributes to a comfortable indoor environment but also plays a significant role in reducing utility bills and minimizing the environmental impact of your plumbing system.
Installation Techniques: A Step-by-Step Guide
Installing pipe insulation on exterior walls is a straightforward process that can significantly improve energy efficiency and prevent freezing damages. Here’s a step-by-step guide to help you navigate this project. First, gather the necessary tools and materials, including pipe insulation (choose the right R-value for your climate), a measuring tape, utility knives, and a heat gun or hair dryer (for expanding the insulation). Start by identifying the pipes that need insulation and measure their length and diameter. Cut the insulation to fit precisely around the pipes, ensuring it covers both sides of any joints. Next, apply a water-resistant sealant around the edges of the insulation to prevent air leaks. Use a heat gun or hair dryer to expand the insulation, pressing it firmly against the pipe for a secure fit. Finally, trim any excess insulation and ensure all connections are sealed tightly.
Maintenance and Longevity: Ensuring Optimal Performance

Proper maintenance is key to extending the lifespan of your exterior wall pipe insulation. Regular checks for any signs of damage, wear and tear, or moisture intrusion are essential. Effective sealing around pipes and fixtures, along with routine cleaning, can prevent debris buildup that could compromise insulation effectiveness. By keeping an eye on these aspects, you ensure optimal performance of your pipe insulation system, thereby reducing heat loss or gain, saving energy costs, and prolonging the overall integrity of your exterior walls.